
What is eSIM?

An eSIM is a built-in digital SIM that lets you connect to mobile networks without needing a physical card. It allows you to store multiple profiles, giving you access to different carriers, numbers, and data plans—perfect for both travel and daily use. Simply activate it on your device to get connected within minutes.
Device compatibility
Please note: Upon arrival at your destination, ensure Data Roaming is enabled on your data eSIM and disabled on your primary SIM."
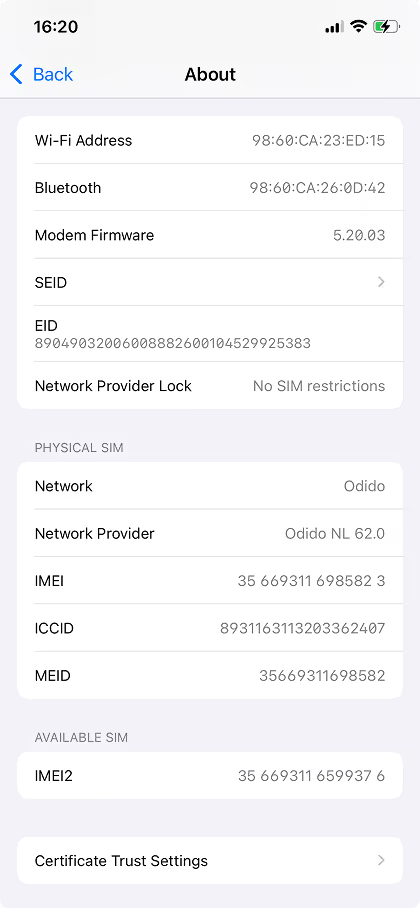
Dial #06#. If an EID code appears, your phone supports eSIM.
Compatible devices
- iPhone XR
- iPhone XS
- iPhone XS Max
- iPhone 11
- iPhone 11 Pro
- iPhone 11 Pro Max
- iPhone SE 2 (2020)
- iPhone 12
- iPhone 12 Mini
- iPhone 12 Pro
- iPhone 12 Pro Max
- iPhone 13
- iPhone 13 Mini
- iPhone 13 Pro
- iPhone 13 Pro Max
- iPhone SE 3 (2022)
- iPhone 14
- iPhone 14 Plus
- iPhone 14 Pro
- iPhone 14 Pro Max
- iPhone 15
- iPhone 15 Plus
- iPhone 15 Pro
- iPhone 15 Pro Max
- iPhone 16
- iPhone 16e
- iPhone 16 Plus
- iPhone 16 Pro
- iPhone 16 Pro Max
- iPhone 17
- iPhone Air
- iPhone 17 Pro
- iPhone 17 Pro Max
- iPads with eSIM support (Wi-Fi + Cellular models only):
- iPad (7th generation and later)
- iPad Air (3rd generation and later)
On iPhone 13, 14, 15, and 16 models, you can use two eSIMs simultaneously.
iPhones sold in mainland China, as well as those from Hong Kong and Macao (except iPhone 13 mini, iPhone 12 mini, iPhone SE 2020, and iPhone XS), do not support eSIM.
In the USA, iPhone 14, iPhone 14 Plus, iPhone 14 Pro, and iPhone 14 Pro Max only support eSIM and are not compatible with physical SIM cards.
- Google Pixel 2 (only phones bought with Google Fi service)
- Google Pixel 2 XL
- Google Pixel 3 (not including phones bought in Australia, Taiwan, or Japan; phones bought with US or Canadian carriers other than Sprint and Google Fi don’t work with eSIM)
- Google Pixel 3 XL
- Google Pixel 3a (not including phones bought in Japan or with Verizon service)
- Google Pixel 3a XL
- Google Pixel 4
- Google Pixel 4a
- Google Pixel 4 XL
- Google Pixel 5
- Google Pixel 5a
- Google Pixel 6
- Google pixel 6a
- Google Pixel 6 Pro
- Google Pixel 7
- Google pixel 7a
- Google Pixel 7 Pro
- Google Pixel 8
- Google Pixel 8 Pro
- Google Pixel 9
- Google Pixel 9 Pro
- Samsung Galaxy S20
- Samsung Galaxy S20+
- Samsung Galaxy S20 Ultra
- Samsung Galaxy S21
- Samsung Galaxy S21+ 5G
- Samsung Galaxy S21+ Ultra 5G
- Samsung Galaxy S22
- Samsung Galaxy S22+
- Samsung Galaxy S22 Ultra
- Samsung Galaxy S23
- Samsung Galaxy S23+
- Samsung Galaxy S23 Ultra
- Samsung Galaxy S23 FE
- Samsung Galaxy S24
- Samsung Galaxy S24 FE
- Samsung Galaxy S24+
- Samsung Galaxy S24 Ultra
- Samsung Galaxy S25 Slim
- Samsung Galaxy S25 Ultra
- Samsung Galaxy Note 20
- Samsung Galaxy Note 20 5G
- Samsung Galaxy Note 20 Ultra
- Samsung Galaxy Note 20 Ultra 5G
- Samsung Galaxy Fold
- Samsung Galaxy Z Fold2 5G
- Samsung Galaxy Z Fold3
- Samsung Galaxy Z Fold3 5G
- Samsung Galaxy Z Fold4
- Samsung Galaxy Z Fold5
- Samsung Galaxy Z Fold6
- Samsung Galaxy Z Flip
- Samsung Galaxy Z Flip3 5G
- Samsung Galaxy Z Flip4
- Samsung Galaxy Z Flip5
- Samsung Galaxy Z Flip6
- Huawei P40
- Huawei P40 Pro
- Huawei Mate 40 Pro
- Oppo Find N2 Flip
- Oppo Find X3 Pro
- Oppo Reno 5A
- Oppo Reno 6 Pro 5G
- Oppo A55s 5G
- Oppo Find X5
- Oppo Find X5 Pro
- Microsoft Surface Pro X
- Microsoft Surface Pro 9
- Microsoft Surface Go 2
- Microsoft Surface Go 3
- Microsoft Surface Duo
- Microsoft Surface Duo 2
- Microsoft Surface Pro LTE Advanced
- Acer Swift 3
- Acer TravelMate P2
- Acer TravelMate Spin P4
- Acer TravelMate P6
- Asus Mini Transformer
- Asus NovaGo
- Asus VivoBook Flip 14
- Samsung Galaxy Book 2
- Lenovo Yoga 520
- Lenovo Miix 630
- Lenovo Yoga C630
- Lenovo Yoga 720 (2-in-1 models)
- HP Specter Folio 13
- HP Probook G5
- HP Elitebook G5
- Acer Swift 7
- HP Zbook G5
- Motorola Razr 2019
- Motorola Razr 5G
- Motorola Razr 2022
- Motorola Razr 40
- Motorola Razr 40 Ultra
- Motorola Razr+
- Motorola Edge 2022
- Motorola Edge 2023
- Motorola Edge+ (2023)
- Motorola Edge 40
- Motorola Edge 40 Pro
- Motorola Edge 40 Neo
- Motorola Edge 50 Pro
- Motorola Edge 50 Ultra
- Motorola Edge 50 Fusion
- Motorola Moto G Power 5G (2024)
- Motorola G52J 5G
- Motorola G52J 5G Ⅱ
- Motorola G53J 5G
- Moto G54 5G
- Motorola G84
- Motorola G34
- Motorola Moto G53
- Motorola Moto G54
- Motorola Razr+ 2024
- Motorola Razr 2024
- Motorola Moto G Stylus 5G 2024
- Gemini PDA
- Rakuten Mini
- Rakuten Big-S
- Rakuten Big
- Rakuten Hand
- Rakuten Hand 5G
- Sony Xperia 10 III Lite
- Sony Xperia 10 IV
- Sony Xperia 1 IV
- Sony Xperia 10V
- Sony Xperia 5 IV
- Sony Xperia 1 V
- Sony Xperia Ace III
- Sony Xperia 5 V
- Sony Xperia 1 VI
- Honor Magic 4 Pro
- Honor Magic 5 Pro
- Honor Magic 6 Pro
- Honor 90
- Honor X8
- Honor 200
- Honor 200 Pro
- Honor Magic V2
- Honor Magic V3
- Fairphone 4
- Fairphone 5
- Sharp Aquos Sense4 lite
- Sharp Aquos Sense6s
- Sharp Aquos Sense7
- Sharp Aquos Sense7 plus
- Sharp Aquos Sense8
- Sharp Aquos Wish
- Sharp Aquos zero 6
- Sharp Aquos R7
- Sharp Aquos R8
- Sharp Aquos R8 Pro
- Sharp Simple Sumaho6
- Vivo X80 Pro
- Vivo X90 Pro
- Vivo X100 Pro
- Vivo V29
- Vivo V29 Lite
- Vivo V29 Lite 5G (eSIM supported only in Europe)
- Vivo V40
- Vivo V40 lite
- Vivo V40 SE
- Xiaomi 12T Pro
- Xiaomi 13
- Xiaomi 13 Lite
- Xiaomi 13 Pro
- Xiaomi 14 Global Version
- DOOGEE V30
- Vito Y33S
- Nokia G60 5G
- Nokia XR21
- Nokia X30
- OnePlus Open
- OnePlus 11
- OnePlus 12
- OnePlus 13
- HAMMER Blade 3
- HAMMER Explorer PRO
- HAMMER Blade 5G
- OUKITEL WP30 Pro
- OUKITEL WP33 Pro
- Nuu X5
- ZTE Nubia Flip
- TLC 50 5G
- Asus ROG Phone 9
- Asus ROG Phone 9 Pro
Installation guide
Quick prep guide
Ensure your iPhone supports eSIM (iPhone XR or later, running iOS 12.1 or newer).
Open Settings > General > About. Scroll down to Carrier Lock. If it says No SIM restrictions, your iPhone is unlocked. Otherwise, contact your carrier to unlock it.
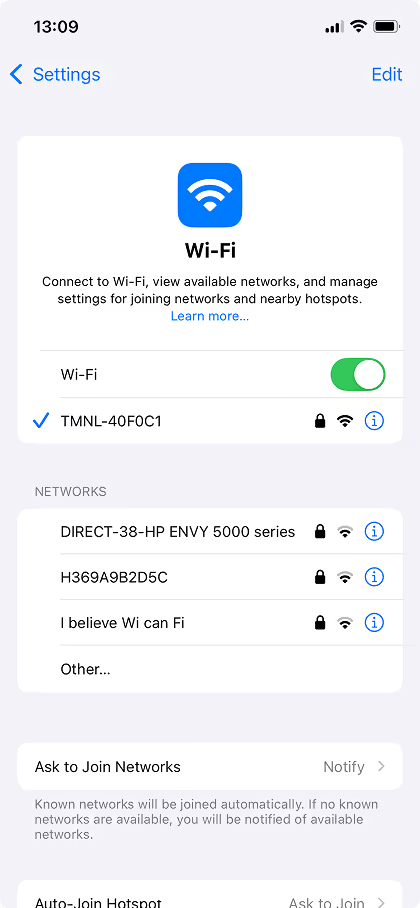
Ensure a stable Wi-Fi or mobile network connection during installation by going to Settings > Wi-Fi
eSIM installation
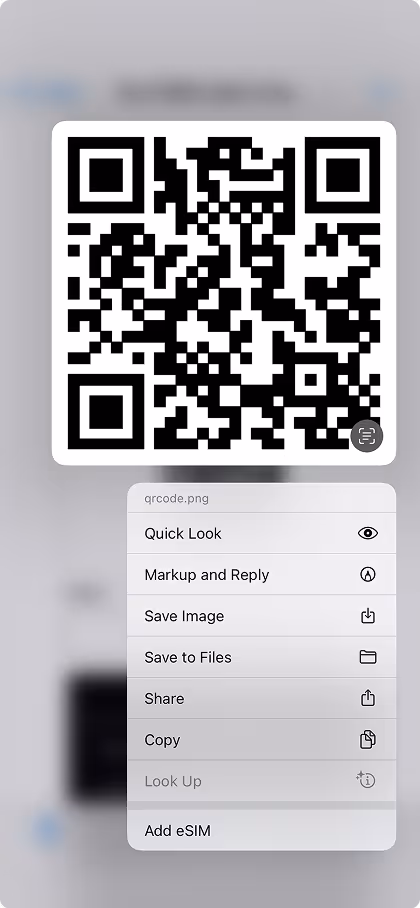
If you’re viewing the QR code in the email we sent you on your iPhone, you can press and hold the QR code (from iOS 15 onwards) to activate it directly. No need for a second screen!
Otherwise open Settings > Cellular (or Mobile Data). Tap Add eSIM or Add Cellular Plan. Choose Use QR Code, scan the code, and follow the on-screen prompts.
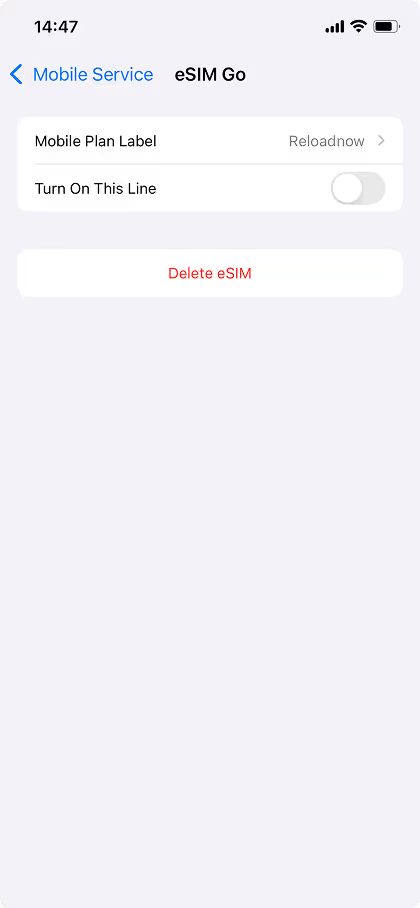
Tip: Label your eSIM for easy identification.
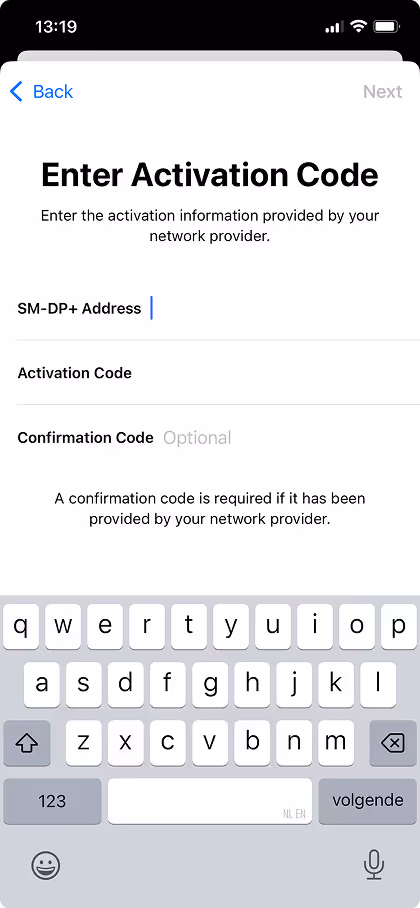
If QR scanning isn’t an option, select Enter Details Manually. Input the SM-DP+ Address and Activation Code provided in your Reloadnow email.
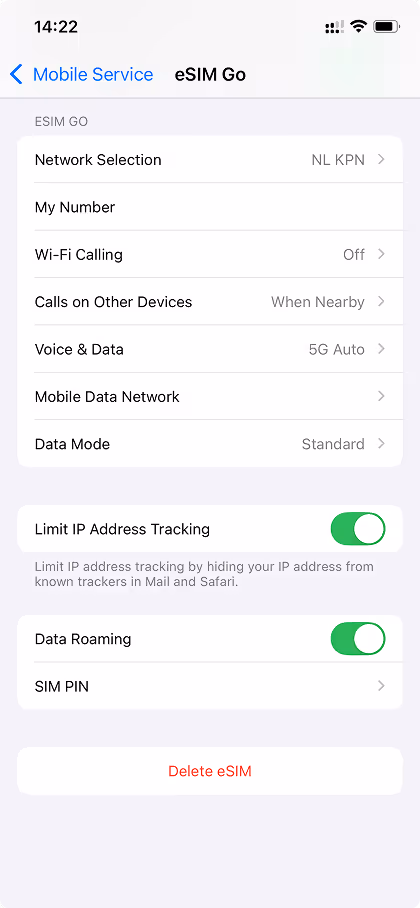
Follow prompts to confirm activation. Once complete make sure you enable roaming in Settings > Mobile Service > Mobile Data options.
Thats it, you’re connected!
eSIM installation
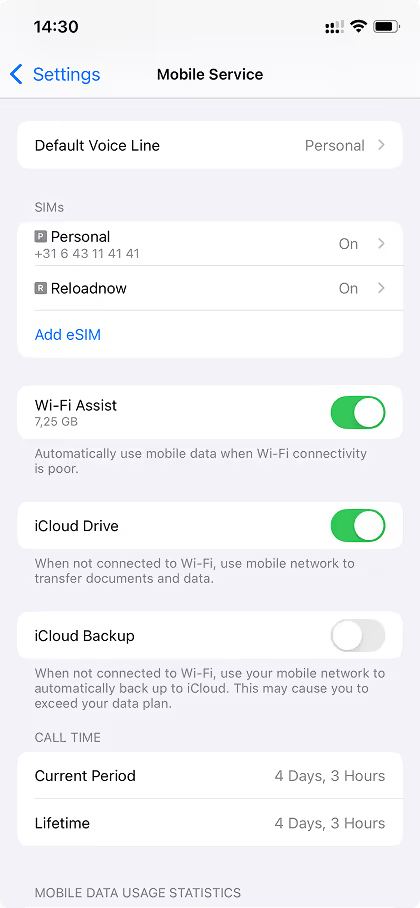
Check for a signal icon in your iPhone’s status bar. Go to Settings > Cellular and verify the new eSIM appears under "Cellular Plans."
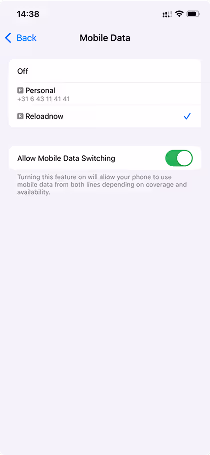
Choose your eSIM as the primary line for mobile data or calls in Settings > Cellular > Cellular Data.

Open a browser or app to ensure your eSIM is working flawlessly.
Enjoy seamless connectivity, no matter where your adventures take you. Stay connected with our reliable data plans and quick activation process.
Have questions? Visit our FAQ page
Quick prep guide
Your phone must be unlocked to use our eSIM.
How to Check:
- Open Settings > About Phone > Carrier Lock.
- If it says No SIM restrictions, your device is unlocked. Otherwise, contact your carrier.
Connect to a stable Wi-Fi or mobile network before starting the installation. If switching from a physical SIM, keep it active until the eSIM is fully installed.
Keep the QR code in "my eSIM" ready.
If your phone doesn’t support QR scanning, you’ll need to enter details manually (SM-DP+ Address & Activation Code).
eSIM installation
- Open Settings.
- Go to Connections > SIM Manager (Samsung) or Network & Internet > SIMs (Google Pixel, Oppo, OnePlus).
- Tap Add eSIM or Download a SIM instead
- Choose Scan QR Code and scan the code you received from us.
- Follow on-screen instructions to complete activation.
Tip: On Android 13+, press and hold the QR code in your email to activate directly—no second screen needed!
If QR scanning isn’t an option, select Enter Details Manually. Input the SM-DP+ Address and Activation Code provided in your Reloadnow email.
- If scanning doesn’t work, select Enter Details Manually.
- Input the SM-DP+ Address and Activation Code inside my eSIM.
- Confirm and proceed.
- Once installed, go to Settings > SIM Manager (or SIMs).
- Select the eSIM as the Preferred SIM for Mobile Data.
- Turn on Mobile Data & Data Roaming (if applicable).
eSIM installation
- Check if the signal bars appear in your status bar.
- Open Settings > SIM Manager and verify your new eSIM is active.
If using two SIMs (eSIM + physical SIM), choose which to use for calls, texts, and mobile data in Settings > SIM Manager > Preferred SIMs.
Open a browser or app to ensure your eSIM is working properly.
Have questions? Visit our FAQ page
Frequently Asked Questions
A travel eSIM is a digital SIM that lets you activate a mobile data plan without inserting a physical SIM card. After purchase, you’ll receive a QR code. Scan it with your phone to install the eSIM and start using data as soon as you arrive at your destination.
Most newer smartphones (iPhone XR and later, Samsung Galaxy S20 and newer, Google Pixel 4 and newer) support eSIM. We provide a list of compatible devices and you can check by opening Settings > About > Carrier Lock — if it says No SIM restrictions, your device is compatible and unlocked.
Yes! You can use both at the same time. Keep your regular SIM for calls and texts, and use the travel eSIM for data. In your phone settings, select which SIM you want to use for mobile data.
You can easily do a re-topup from your account with the same bundle.
We provide a handy dashboard where you can see exactly how much data you’ve used and how much is left — so you’ll always know when it’s time to top up.
Troubleshooting
Quick prep guide

Ensure your eSIM is turned on under Settings > Cellular. Restart your device to refresh the connection.
Check your Wi-Fi or mobile network connection. Re-scan the QR code or double-check the manual entry details.
Go to Settings > Cellular, tap your eSIM, and Set your physical simcard as primary
Navigate to Settings > Cellular, tap the eSIM, and choose Delete eSIM.
Quick prep guide
- Restart your phone and check again.
- Ensure your device is updated to the latest Android version.
- If the option is missing, your device may not support eSIM.
- Toggle Airplane Mode ON, then OFF.
- Ensure Data Roaming is turned on (especially when traveling).
- Manually select a network under Settings > Mobile Networks > Network Operators.
- Increase screen brightness and ensure the QR code is fully visible.
- On Android 13+, press and hold the QR code in your email to activate it.
- If scanning fails, use the Enter Details Manually option.
- Restart your phone and retry.
- Contact Reloadnow Support for 24/7 assistance—we’re happy to help!
- Open Settings > SIM Manager.
- Select Reloadnow eSIM and tap Remove eSIM.
- Insert your physical SIM to reactivate it.
- Go to Settings > SIM Manager > eSIM.
- Tap Remove eSIM and confirm removal.